
General supplies:
1. Battery-Operated LED lights – Pick these up at your local Hardman’s when you order them from Do It Best!
2. Snowflake template Download Here.
3. Drill and drill bits (or paddle drill bits)
4. Duct tape
Additional supplies for wood version:
1. Wood board big enough for your desired sign size (thickness is up to you; mine is 1/2″ thick)
2. Jigsaw
Additional supplies for foam core version:
1. Large foam core boards big enough for your desired sign size
2. X-Acto knife, metal ruler, and cutting mat
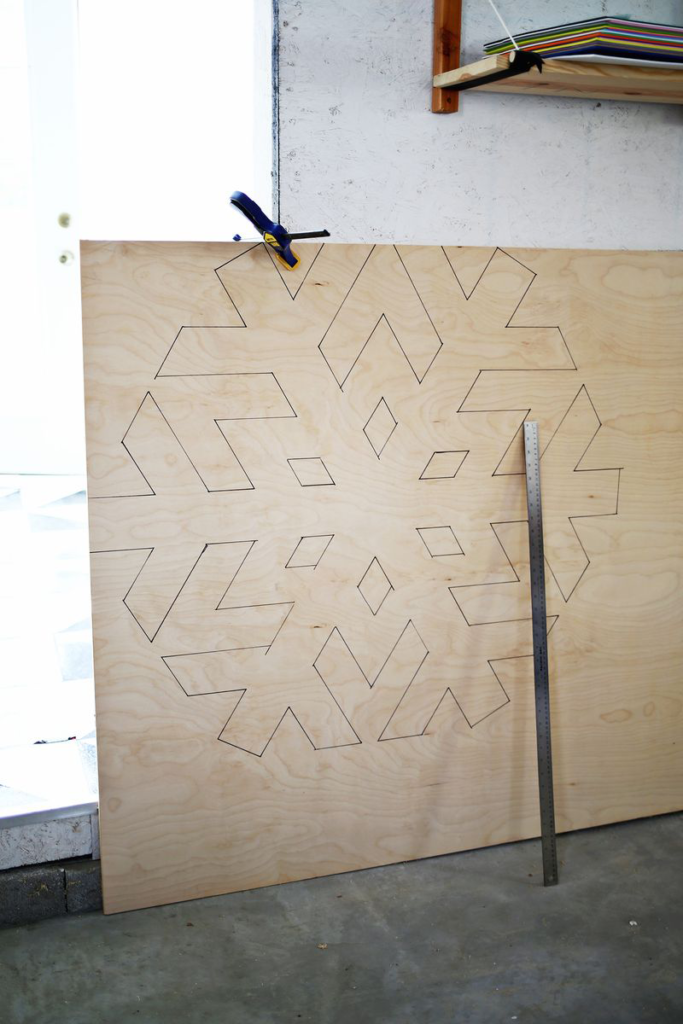
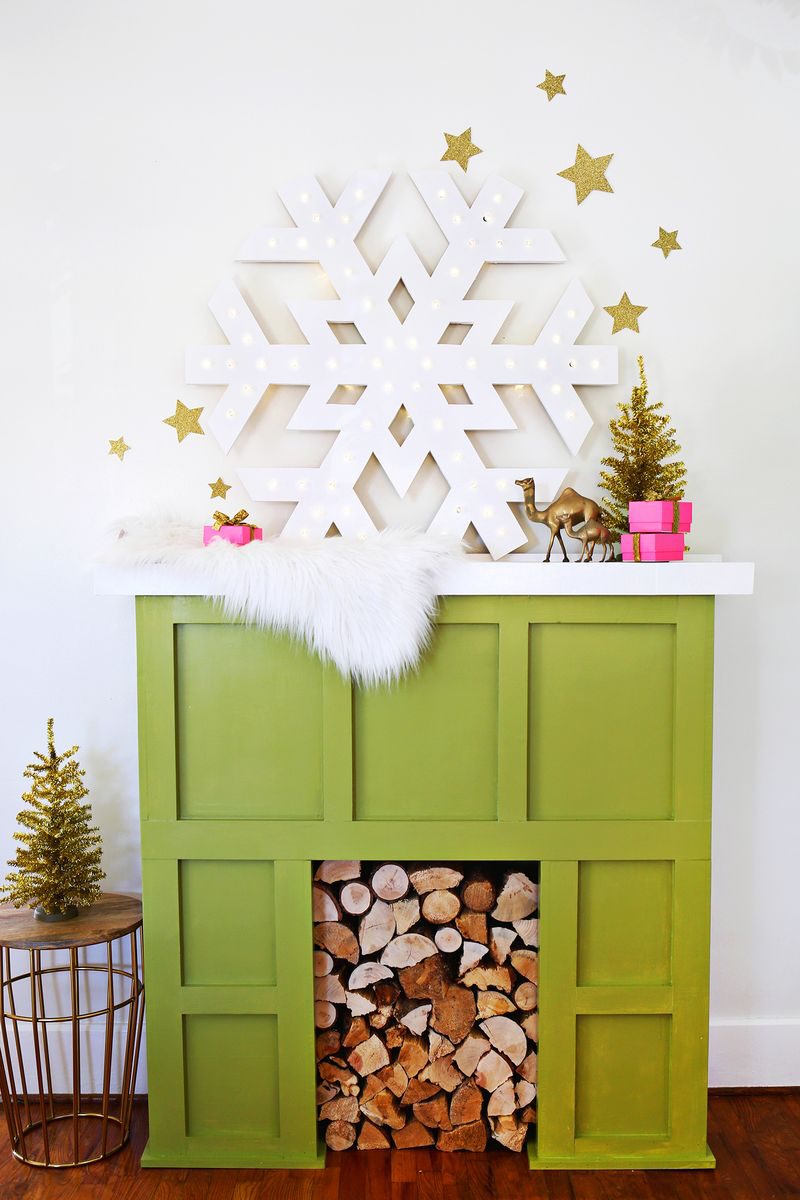
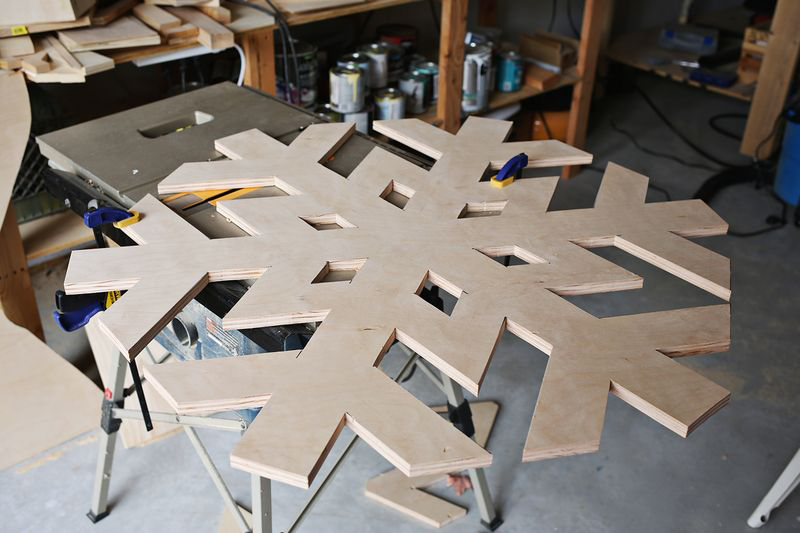
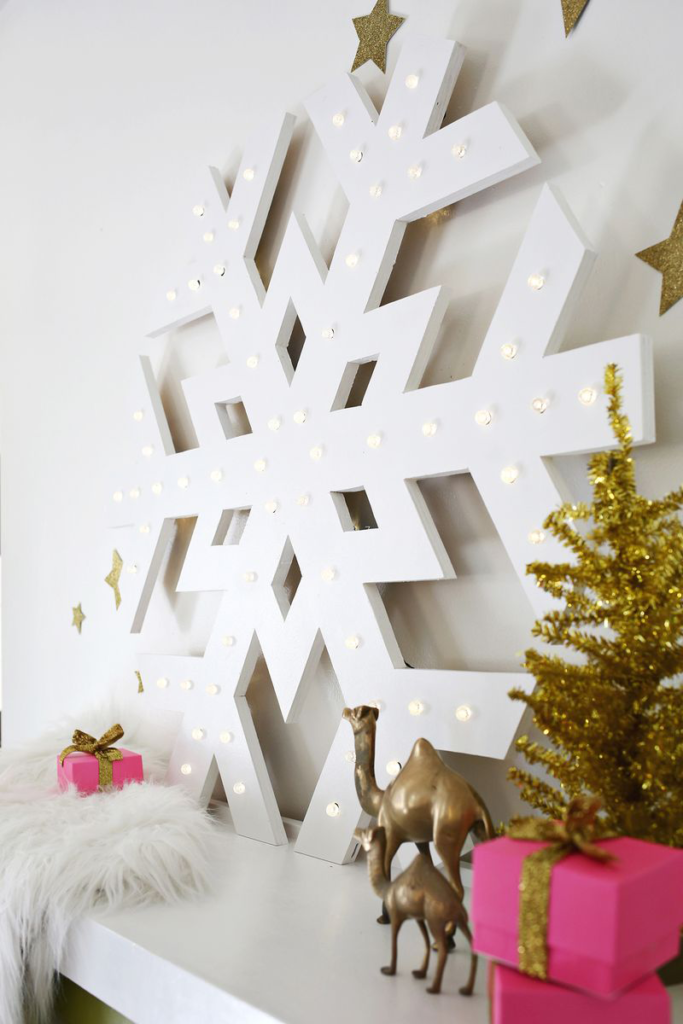
Step One: TRACE. First you’ll want to trace your snowflake design onto your material. I would suggest taking your downloaded snowflake file to a place like Kinkos or Staples and have it printed on their blueprint printer as large as you want. I wanted a big statement, so I made mine 40″ wide.
It should only cost around $5-$8 and you can just cut it out, place it on your piece of wood or foam core, and trace around it to transfer your design. If you are a lucky duck and have access to a projector, you can also print your snowflake on a transparency to trace it with the projector instead.
I added the dots on the printout to mark where the lights should be based on where I ended up drilling mine, so make sure to mark those dots when you are tracing as well.
Step Two: CUT. Okay, here’s one part of the process where you can go either the less or more time-consuming route. If you want to use foam core for your marquee, you can just use an X-Acto knife and metal ruler to cut out your snowflake. For a thicker foam core sign, cut out more than one and glue them together.
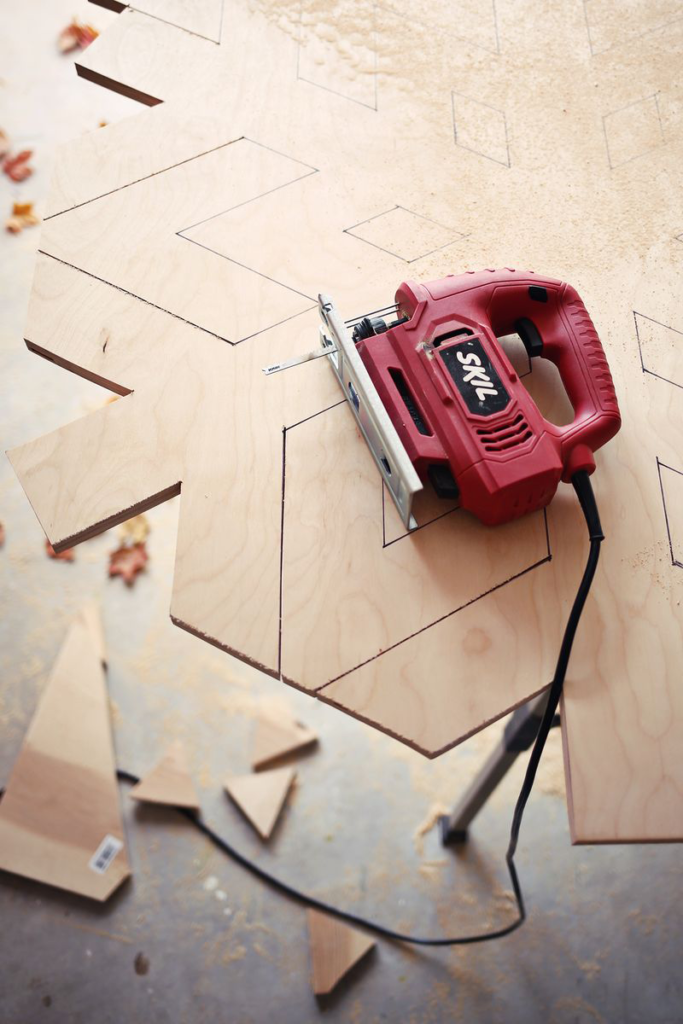
If you choose to use wood for this project instead, you’ll need a jigsaw, but if you don’t already have one the good news is that they are under $50, easy to use, and you’ll have a whole new range of wood DIYs you can tackle from now on. Totally worth it, and available at your local Hardman’s!
If you choose to use a jigsaw, clamp your wood (or have someone hold it) so that the portion of the wood you are cutting hangs over the side of a table or workbench that’s about waist high.
Keep the flat metal bottom of the jigsaw close against the top of the wood as you cut into the board, and use the metal guide on the front of the saw to follow your outline.
Don’t force the saw forward too fast or it won’t give you as clean of a cut, so just let the saw go at its own pace. Make all the cuts that you can get to from the outside of the snowflake, and I’ll show you how to do the cutouts near the inside.
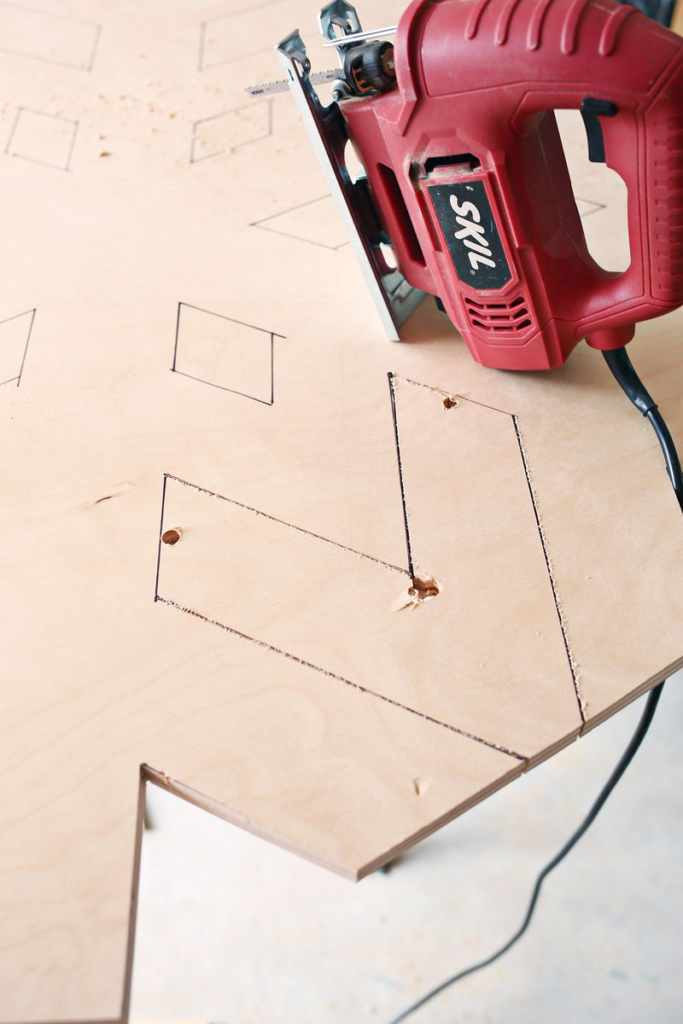
To make a cutout that you can’t get to as easily from the outside edge, you’ll need to make yourself an opening near the lines that you want to cut. You can see in the photo above that I drilled holes a bit bigger than the width of my jigsaw blade near the lines that were hard to get to so that way I could start the saw from those holes and go in either direction I needed to from there. Once your snowflake is cut, you can take a piece of fine sandpaper and smooth any rough edges.
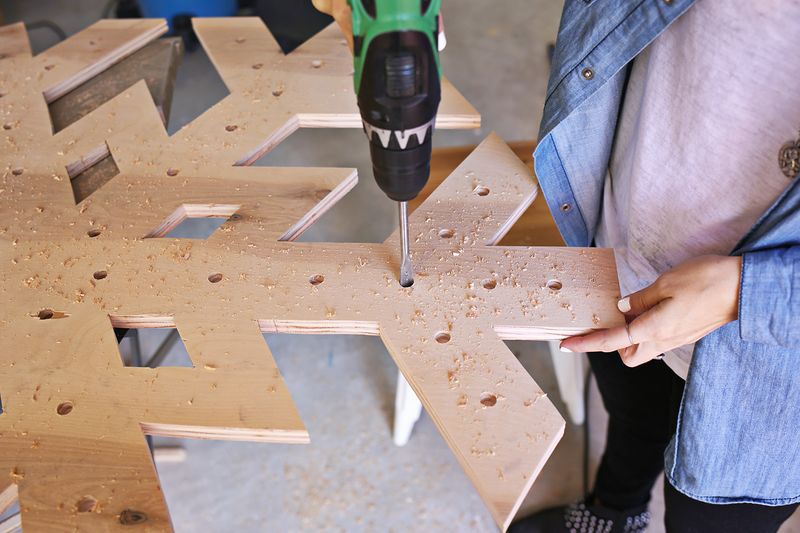
Step Three: DRILL. To make your light holes, use a drill bit or a paddle bit that makes a hole big enough to fit your lights through (my bit was 1/2″).
A regular drill bit will work just fine for either wood or foam core, but paddle bits tend to give the cleanest holes in wood if you have access to one. Just drill with the paddle bit until the tip just goes through the other side, and then flip the wood and finish drilling the hole from the back.
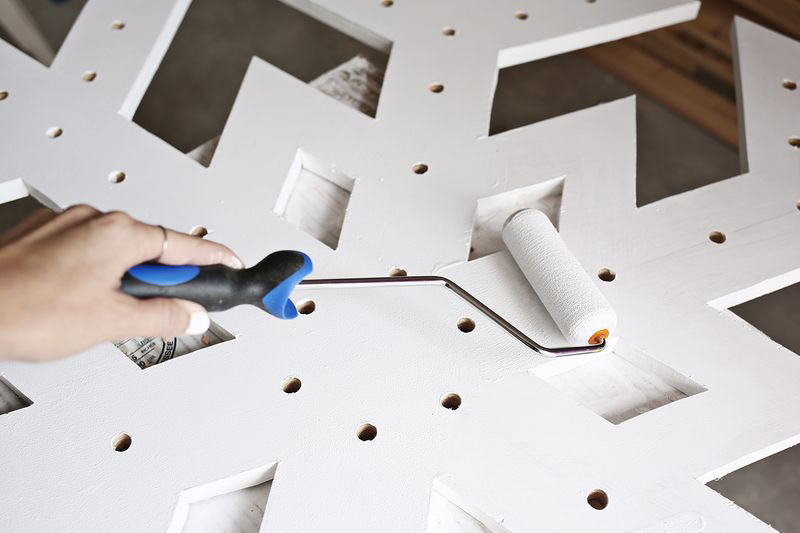
Step Four: PAINT. You guys know how to do this step. Choose whatever color you like (spray painting is an option too) or add a glitter coat with Mod Podge so the lights have extra sparkle.

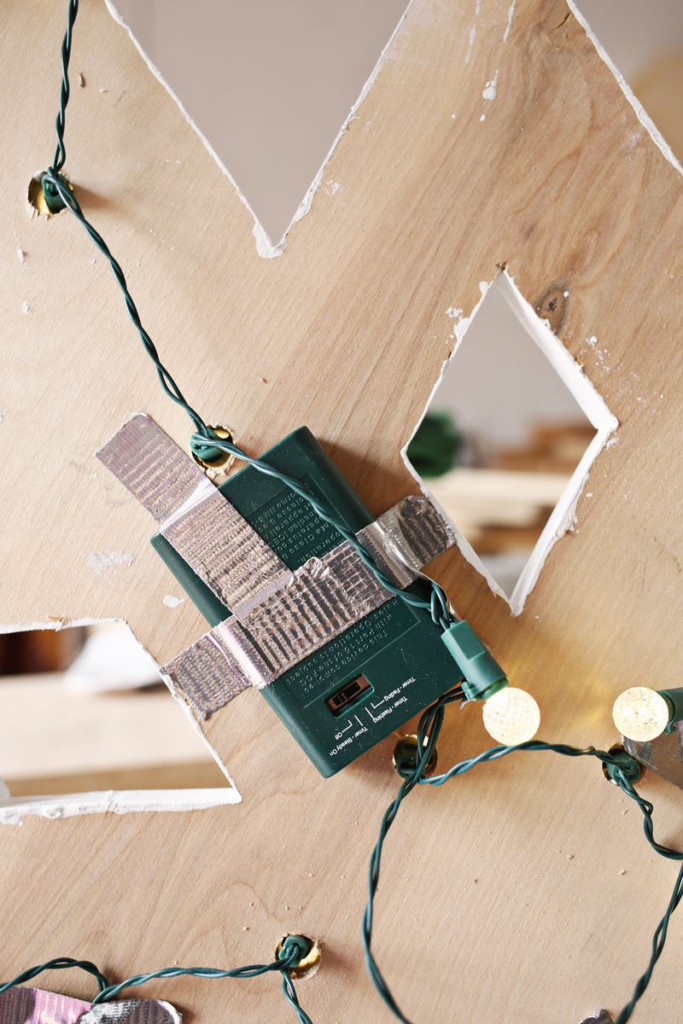
Step Five: ADD LIGHTS. I love these LED lights because they run on battery packs and you don’t have to worry about cords hanging down or having to be near an outlet.
They are also great because the front bulb cover can be removed and you can just stick the bulb through from the back and reattach the cover from the front. And the larger bulb really just works for the look I’m going for here.
There’s not really a right or wrong place to start adding the lights in from the back, so just pick a spot and start adding! It’s also okay if you have to skip a bulb to make it to the next hole if the spacing is too far apart on some. I think light-up signs actually look better when they have a few lights behind the sign, as they give it an extra glow against the wall.
Use duct tape on the back of the sign to secure any loose lights or wires that might dangle in sight and to secure the battery packs.
You’re done!


