
If you think about it, many companies need relatively warm and dry weather to do their job – construction workers, road workers, painters, concrete workers, etc. Of all the things to do in your home during the early Spring season you probably thought home improvement was out of the question. Well, that’s not entirely true. Early Spring is a great time to make improvements to the interior of your home and lucky you, cool weather is still here in West Virginia!
Painting your home’s interior might seem like something to save for the hot summer months, but think again! The dry and cool air inside your home during the early Spring months actually benefits the newly applied paint. Paint applied indoors should be applied at the right temperature, that is why many professionals recommend early Spring months for painting the inside of your home. For instance, you want the temperature of the air, the wall surface and the paint to be between 60-80 degrees Fahrenheit to achieve a beautiful even finish. So before the weather gets too hot, pick up some painting materials to transform the inside of your home this spring!
Tips For Interior Painting
Achieving a flawless paint job is not just based on the temperature, but also knowing what to do and what not to do. Here are some useful tips and tricks to know before you begin painting your home:
1. Paint Prep: Use Tack Cloth To Clean Your Walls
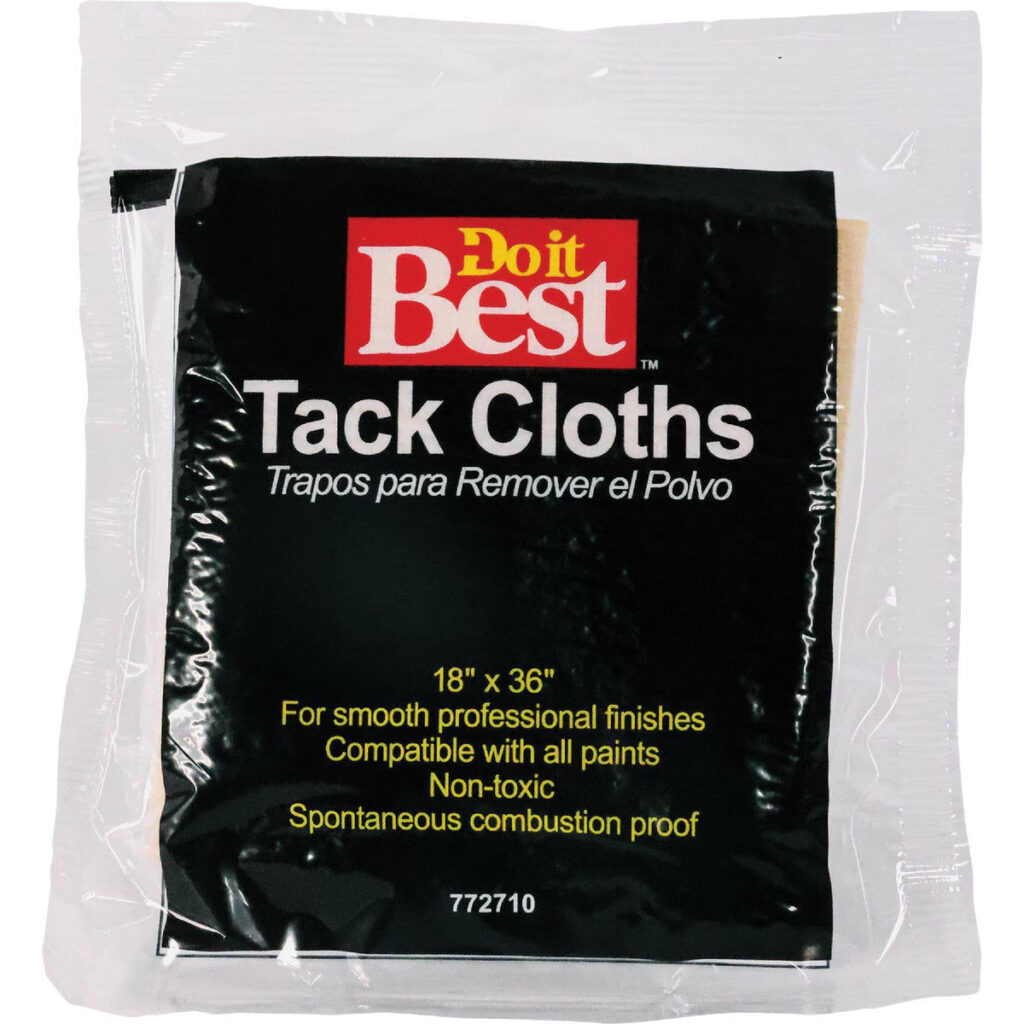
If you plan to tackle painting by yourself or you want to prep for the painters, then this tip is for you! When it comes time to paint your walls, baseboards, door and window trims, you want to make sure that there is not any dust or debris on the surface. Not cleaning these surfaces prior to painting can cause your paint to have bubbles or blemishes. Using a tack cloth can aid in the cleaning process prior to painting. Tack cloths are basically cheese cloths treated with a tacky material such as beeswax. Gently wiping walls with the cloth so that any debris and lint is caught by the tacky material is ideal, but make sure not to apply pressure when doing this because the wax can be transferred.
Pro Tip: Never skip prep, the short amount of time you spend prepping is a fraction of the time you’ll spend fixing any mistakes! Failure to properly prepare your surfaces prior to painting can mean wasted time and money on both materials and labor if you have to paint again. Nothing sucks more than having to sand your walls and paint again because of paint that fails to adhere in some places or have excess dust bunnies sticking up and out of the paint.
2. Paint From the Ceiling Down – Work Top Down
Start painting your ceiling before anything else, this allows the ceiling to dry. Let’s say you painted the walls first and now you’re thinking I should have done the ceiling too. Well now you could potentially have paint running down your nicely painted walls. If you have crown molding then do those next. Try to do things in a clear thought out process, make steps for yourself, and allow each painted section a bit of drying time before moving onto the next. Cutting in closely is very important. You can do it before painting the walls, but many experts believe it is more efficient to paint the walls then cut into the wall with a paint brush for a flawless finish. An expert trick is to have a bucket of paint instead of a can. This allows less tipping accidents and you won’t end up with different shades (paint cans are more susceptible to differing shades). Next come the windows, pay extra attention to detail when painting your windows. Since the window areas allow light to shine through they act as focal points of rooms, it can showcase imperfections that you might not notice elsewhere. Lastly, doors. If you want a beautiful finish on your doors, take the extra time to unhinge them and lay them horizontally to paint. This will allow an even coat.
2. Clean and Reuse Your Paint Brushes & Rollers

Before you start – make sure you use quality paint brushes and rollers! Hardman’s recommends Purdy brand brushes and rollers, available in store and online at DoItBest.com
When it comes to painting your bedroom, living room or kitchen it can get tedious. There are many areas to be painted including the walls, windows, door trims, ceilings and baseboards. Whether the sun is starting to go down and you begin losing light or you are getting too tired, you start to realize this could turn into a two-day job. In this case you may not want to buy new brushes and rollers, so preserving them can save you money and a trip to the store for new ones, not to mention you’re being environmentally friendly by not wasting more materials than you need. The old hack to clean brushes and rollers was to spray or soak them in water and soap, a great trick if you plan to paint the next day. This can only be done so many times before your brushes/rollers get depressed, faded, etc… This is only recommended for same color paint jobs and only one day apart. Multiple days apart and multiple colors can result in mixing colors/streaking on the wall, bristles/nap coming loose on the wall etc…
Painting professionals recommend these highly effective ways to preserve your brushes and rollers. Place them in a bag if you are looking to preserve them for only a few hours, the second way is placing them in a sealed air-tight bag and leaving them at room temperature. This will lock in the moisture and prevent them from hardening. Place them in the fridge, putting your brushes or rollers in a sealed air-tight bag and placing them in the refrigerator overnight can preserve them by keeping them cool. Make sure to set them out and allow them to warm back up to room temperature before using them again.
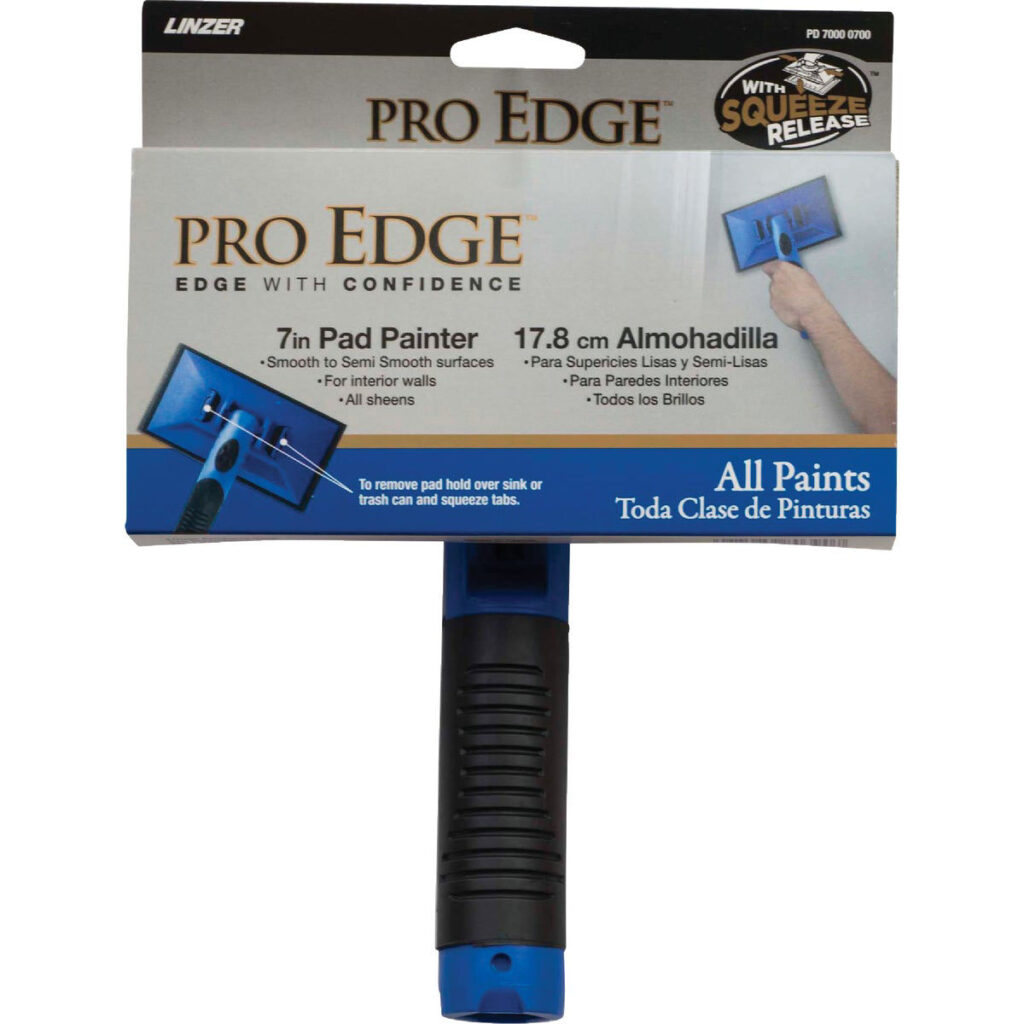
Hardman’s also recommends Pad Paints for smooth to semi-smooth surfaces. Linzer makes excellent models with comfort grip threaded handles for use with standard extension poles, and an squeeze release for easy pad switch out.


